We have all been there. You need to submit ten pages tomorrow, you have barely covered six, it’s already way past midnight and you are completely out of ideas. Your eyes are red, your eyelids are heavy, the blinking cursor seems to mock you…
If only you could make your paper look a bit longer without actually working on the word count! Well, there are some tricks to do it.
Now, if you are bent on coping with it yourself, just this time, here are the quick fixes that make text appear longer.
How To Make A Paper Look Longer
Anyone with a rudimentary knowledge of word processors has some ideas of how to stretch a text over more pages. Make margins bigger! Make the font bigger! Easy peasy! However, what we need to know is how to make a paper longer without a teacher noticing. The answer to that is subtlety. With the help of many minor tweaks, you can achieve a pretty impressive accumulated result, but you must be very discreet.

1. A trick with periods and commas
Probably the least noticeable thing you can do is to enlarge all the periods and commas in your paper. For example, if you have 12 pt. font overall, making only periods and commas 14 pt. and italicizing them will add several lines of lengths to your text. No kidding. To do that, go to “Find and Replace” in the menu, put your usual “.” in the “Find” field. Click on “More” under the “Replace with” field, and click “Format”. There, find “Font” settings. It the menu that will pop up you should select the font size that is one or two points bigger than the rest of your text and don’t forget to make it italic as well.
It’s probably the best to make it after you’ve completed all other manipulations with the main text, so you don’t scrap all this finicky work with one click while adjusting the font.
2. Adjusting spacing between the lines
This is where you will have to be very careful not to overdo it because it’s very visible. Adjusting the spacing should be as subtle as possible. For example, if your teacher specified a single-spaced paper, then you can probably get away with 1.1 or 1.2 spacing instead. Go to “Format” –> “Paragraph” –> “Line Spacing” –> “Multiple” and adjust the “By” factor to 1.2.
3. Adjusting spacing between characters
This trick is less known, although it can get you additionally one page without hassle. Character spacing adjustments are less visible than line spacing, but you should also be very discreet to succeed. To do that, go to “Font” –> “Advanced” –> “Spacing” –> “Expended”. Put the value into the “By” box. Don’t get greedy and keep the factor between 1.2 and 1.5 – whichever yields the best result without getting too noticeable.
4. Different font
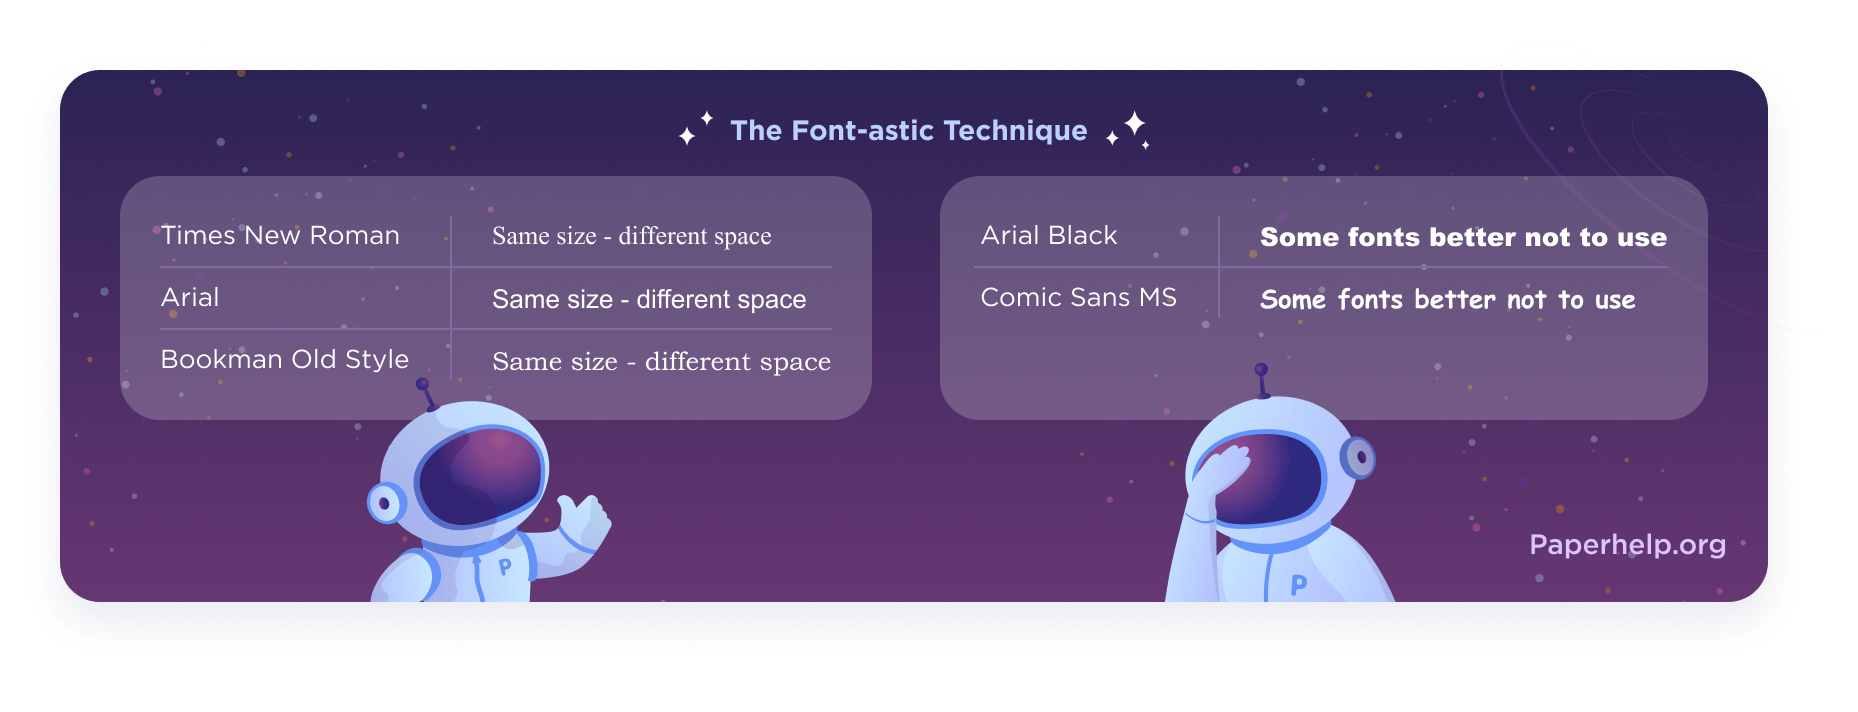
As a rule, instructors ask students to submit their papers in Times New Roman. However, there are fonts that look very similar but are a little larger. For example, Bookman Old Style. If your instructor hasn’t given you any directions on that account, you can pull off setting any of the larger fonts like Arial, Armen CT, Bangla Sangam MN, Cambria, Courier New, Quicksand, etc. However, don’t be too on-the-nose with this. Fonts like Arial Black or Arial Rounded MT Bold are probably too much to go unnoticed by your teacher.

5. Larger font size
This is where you have to be really sneaky. Don’t increase your font more than +0.1 – 0.5 pt., otherwise, it will be super obvious. For example, if your teacher specified 12 pt. font size, you can increase it to 12.5 pt. max. without being too noticeable.
6. Increased margins
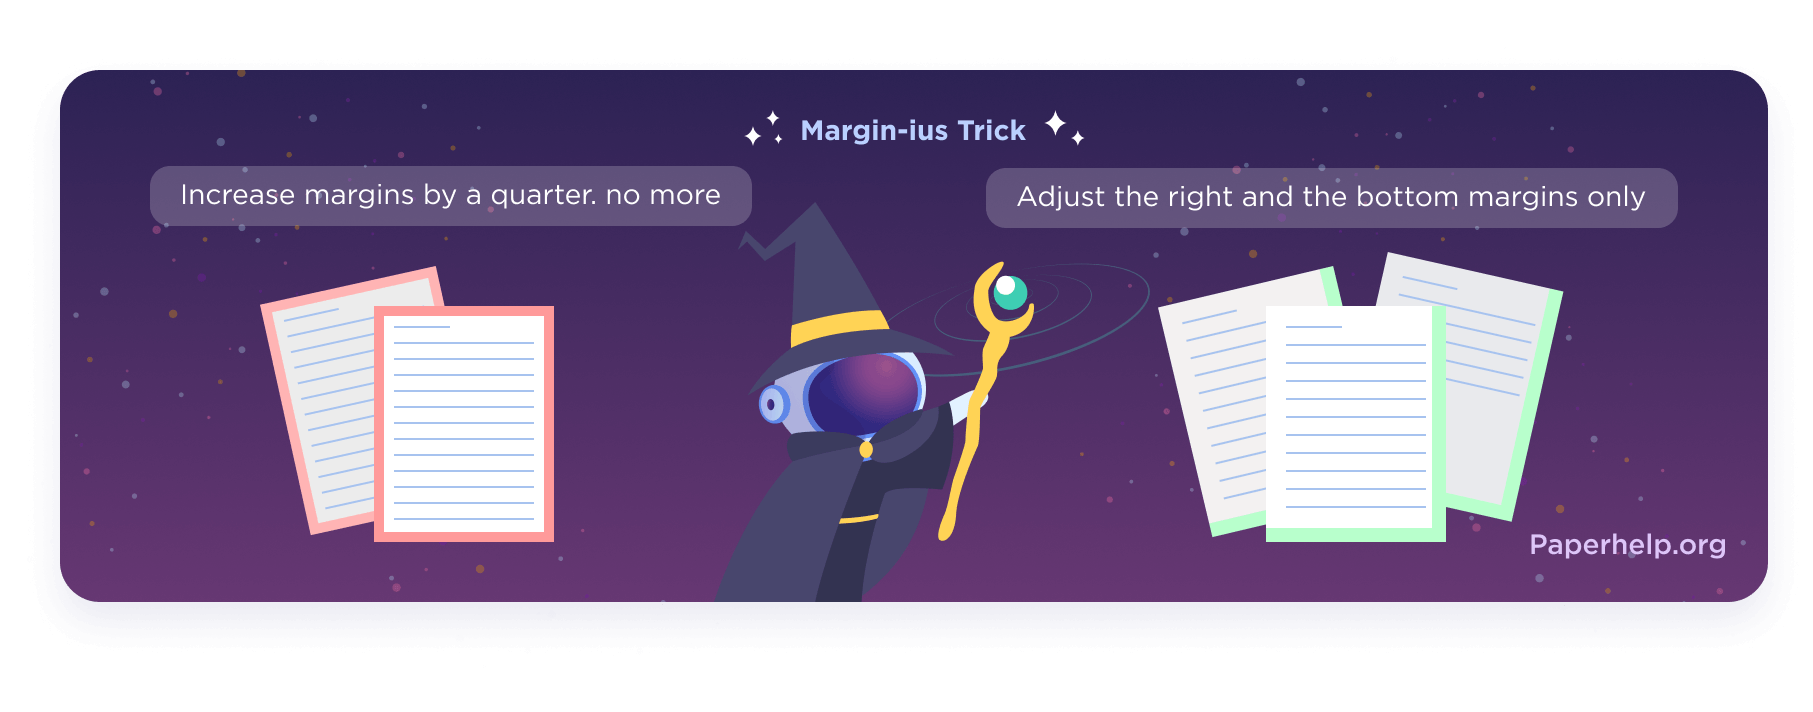
The rule of thumb here is increasing margins by a quarter, no more. For example, if the margins are required to be 1 inch, you can make them 1.25 instead. This should not be very visible. However, we recommend limiting yourself to adjusting only the right and the bottom margins, since they are usually less visible.
To do that, go to “Format” –> “Document” –> “Right” (and “Bottom”) and type in 1.25 (or less) in the corresponding box.

7. A footer with page numbers
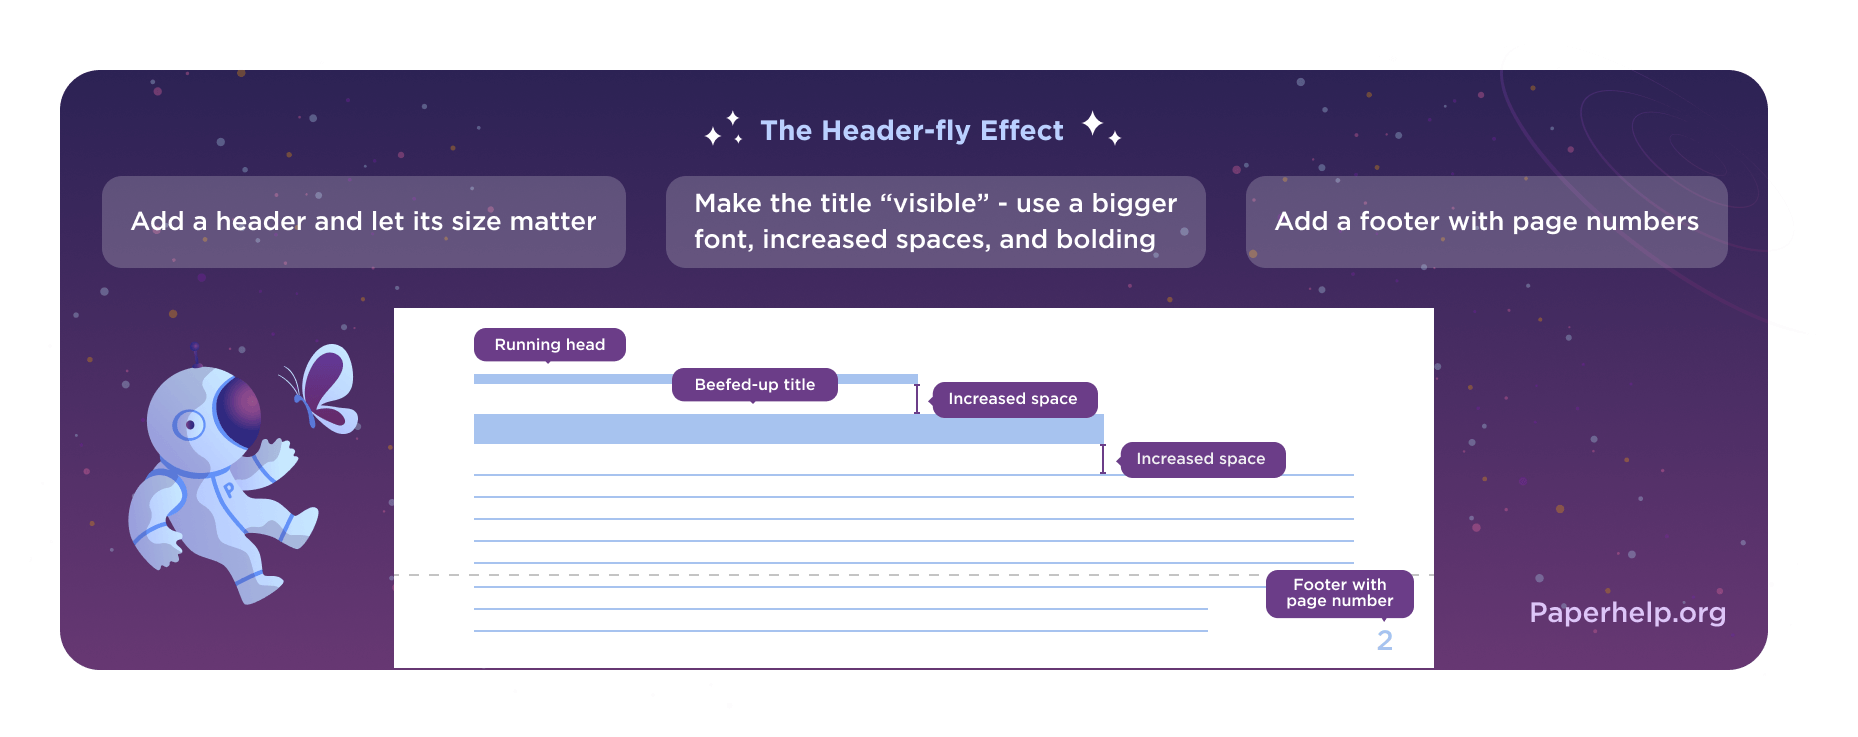
To veil the tweaking of the bottom margin and stretch it even further, add a footer with numbers. It will give off the detail-oriented vibe and will look like you have really thought through the presentation of your paper. Good on you!
To do that, go to “Insert” –> “Page Numbers” –> “Position” –> “Bottom of Page”.
8. Running head with the title of your paper
This little trick is neat because running head adds length to your paper and is strictly within the APA requirements – yes, really. Another bonus is that according to APA standards your title must be in all-caps.
To add a running head, click on the top of your page to edit the header area and select “Different First Page”. Type “Running head: YOUR TITLE”. Now go to page 2 and add YOUR TITLE without the words “Running head”. Brilliant! Now you can close the header area.
9. Beefed-up header
Make the most of it. Add your name, the date, your course name, the name of your instructor, your email, or student ID number. Then double-space it, to make it longer. Don’t worry. It’s a header, it’s separate from the text, you can do it here.
You can also add a line or two with your other credentials, for example, a Twitter handle, but only if they are relevant (for example, you’ve been doing research on the internet slang and you’ve gathered information on Twitter).
10. Adjusted title
First of all, make your title separate from the header, place it on the line below. Put a little extra space around it, increase its font size, and bold it. Everything for the sake of making it more visible, naturally!

Done! That’s the maximum you can do without working with the content of your paper. However, here are some very quick tweaks that hardly take any time to do:
-
1. Ditch the contractions
First of all, this will boost the length and word count. Second, you should not have done it in a college paper anyway. Finally, the academic style is on your side! Use “Find” to track all the apostrophes in your text and replace contractions with full forms by hand.
-
2. Spell out the numbers
To do it quickly, run all the numbers through “Find and Replace”, only don’t select “Replace All”. Watch every case carefully: you don’t want to replace “1” in “1984” with “one” etc.
-
3. Replace pronouns with names, where possible
Names are, as a rule, longer than “he” or “she”. Know what I mean? Hunt your pronouns using “Find” and replace them with appropriate names by hand.
Now your paper looks considerably longer. However, if you will submit it as a Google Doc or a Word Doc, your adjustments will be very easy to spot. I mean, you don’t have to be Einstein, to spot that the box at the top of the page doesn’t say “Times New Roman 12”. Therefore, we recommend you doing your paper properly next time.


